Other - Making Christmas Cards
The last two years I have chosen to make my Christmas cards to my close family. I have chosen 2 designs.
I will show you how to make each Design
 |
| My Homemade Cards |
Making Christmas Cards
Rudolph
 |
| Rudolph card |
To make 1 Rudolph card you will need
* 1 blank white greetings card
* Reindeer Template
* Brown felt
* Scissors
* A pair of large Googly Eyes
* Red Mini Pom-Pom
* PVA Glue and glue spreader - an old lolly stick will do
Method
Get a blank white card - you can get these from craft shops, or just fold a piece of card in half to make a card
Get your template (there easy to find on Pinterest or Google) and place it on your card so you know what potion to place your head and antlers
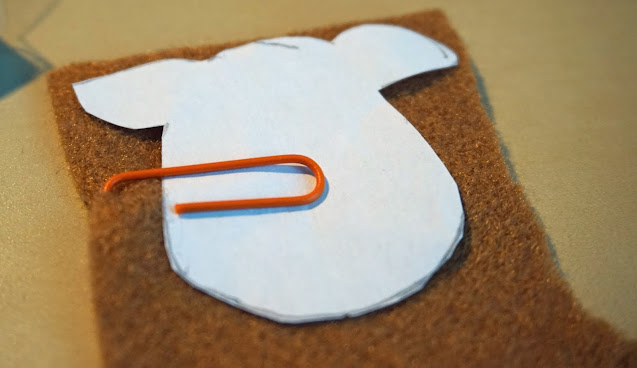
Then place your templates for the head and the antlers on the felt and cut them on - I used a paper clip to hold the template a sewing pin is better to use.
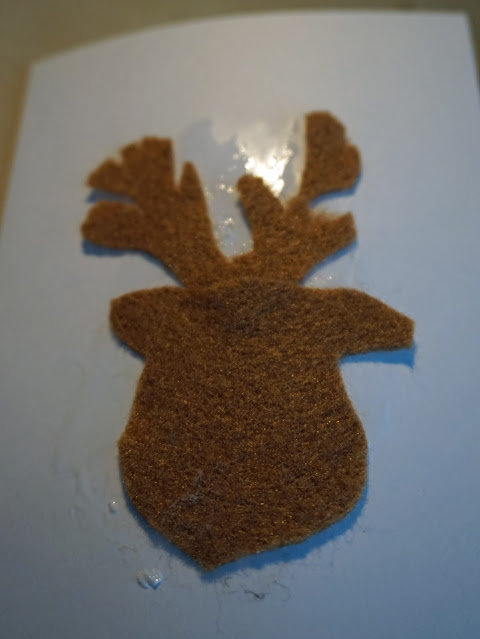
Once cut the shapes place them on your card, to check the position. Once happy with the position glue using PVA glue on to the card, glue the antlers on first then the head and leave to dry
Once dry place the googly eyes on the felt head, and glue in position and leave to dry
Once dry, dip in the mini pom-pom in the PVA glue and place under the eyes to create the red nose and leave to dry
Once dry you can write your message in the card or add extra like a scarf using festive ribbon, or any other decoration or leave it as it.
Get your template (there easy to find on Pinterest or google) and place it on your card so you know what potion to place your bear, if your doing two bears flip the card to landscape and place the temple so the bears look into each other eyes with noses touching
Then place your template for the bear on the felt and cut them out - I used a paper clip to hold the template a sewing pin is better to use. If your doing two bears cut out two bears from the felt
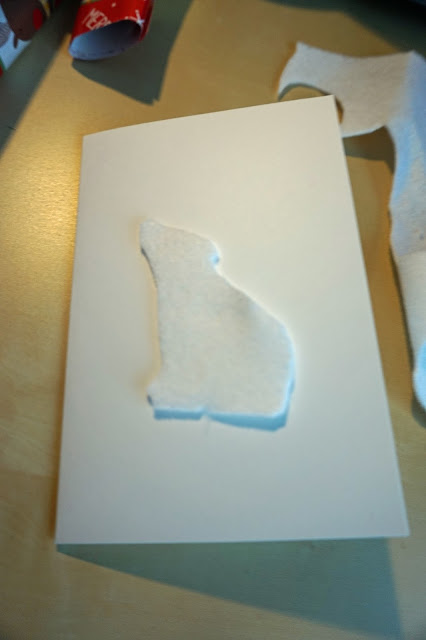
Once cut the shapes place them on your card, to check the position. Once happy with the position glue on to the card. If your doing two bears make sure that the noses are touching when glued
Once dry, cut a small piece of ribbon, then glue it on the bear and leave to dry.
Once dry, using a permanent marker add a small dot for the eye and a small coloured in patch for the nose and leave to dry
Once dry you can write your message in the card or add any other decoration or leave it as it.
Have you made homemade Christmas Cards before, let me know in the comments
 |
| Blank greetings card that you will need |
 |
| Me placing the reindeer template on the card to gage the location on the card |
 |
| The template paper clipped the the brown felt |
 |
| The glued cut own felt Reindeer head with the antlers |
 |
| The eyes glued on to the felt head |
 |
| The finished card with the red pom pom rose added |
Polar Bear
 |
| Polar Bear Christmas Card |
To make 1 Polar Bear card you will need
* 1 blank white greetings card
* Polar Bear Template
* White Felt
* Scissors
* Festive Ribbon
* PVA Glue and glue spreader - an old lolly stick will do
* 1 sharpie Permanent marker pen
Method
The method is pretty much the same as for the Reindeer Rudolph card, so follow step 1 of the Rudolph card
 | |
|
 |
| The template placed the the white felt |
 |
| The glued cut out felt Polar bear clued on to the card |
 |
| The Polar Bear, with the cut piece of Ribbon glued on |
 |
| The completed Polar bear card, with the addition of a nose and eye |


No comments
New comments are not allowed.